Golden Oven-Crisped Chicken Strips: Your New Family Favorite 🍗✨
1. Introduction
If you’re searching for a delicious, healthy, and easy-to-make meal, these baked chicken tenders are the perfect choice. Crispy on the outside and tender on the inside, these homemade chicken tenders are a healthier alternative to fried versions and are sure to become a family favorite. Perfect for quick weeknight dinners or weekend gatherings, this recipe combines flavorful seasonings with a crispy coating, all baked to perfection. With simple ingredients and straightforward steps, you’ll love how easy it is to elevate your dinner game with this irresistibly crispy dish.
2. Ingredients Needed for Crispy Chicken Tenders
- 1 pound boneless, skinless chicken breasts or tenders
- 1 cup all-purpose flour
- 2 large eggs, beaten
- 1 cup panko breadcrumbs
- ½ cup grated Parmesan cheese (optional for extra flavor)
- 1 teaspoon garlic powder
- 1 teaspoon paprika
- ½ teaspoon black pepper
- Salt to taste
- Cooking spray or olive oil
3. How to Make Baked Chicken Tenders Step-by-Step
Preparing the Chicken
Start by cutting the chicken into evenly sized strips to ensure they cook uniformly. Pat the chicken dry with paper towels and set aside.
Preparing the Breading Stations
Set up three shallow bowls: one with flour, one with beaten eggs, and one with a mixture of panko breadcrumbs, Parmesan cheese, garlic powder, paprika, salt, and black pepper. This setup makes the coating process quick and efficient.
Dipping and Coating the Chicken
Dip each chicken strip into the flour, then the egg, and finally coat thoroughly with the breadcrumb mixture. For extra crispiness, press lightly on the breadcrumbs to adhere well to the chicken.
Baking the Chicken Tenders
Preheat your oven to 400°F (200°C). Place the coated chicken strips on a baking sheet lined with parchment paper or a silicone baking mat. Lightly spray the tenders with cooking spray or drizzle with olive oil to help achieve a golden, crispy exterior. Bake for about 20-25 minutes or until the tenders are cooked through and crispy.
4. Storage Tips for Leftover Crispy Chicken Tenders
Allow the cooked chicken tenders to cool completely, then store them in an airtight container in the refrigerator for up to 3 days. To reheat, place them on a baking sheet and bake at 375°F (190°C) for about 10 minutes until hot and crispy. For a quick option, you can also reheat them in the Ninja Air Fryer Pro Crisp & Roast, which restores their crunch effortlessly.
5. Serving Suggestions for Crispy Homemade Chicken Tenders
These crispy chicken tenders are incredibly versatile. Serve them with classic sides like honey pepper chicken pasta or a fresh garden salad. For dipping sauces, try honey mustard, ranch, or your favorite blue cheese dressing. They also make great party snacks or kid-friendly lunch options.
6. Why Choose Oven-Crisped Chicken Tenders?
Choosing oven-baked over fried crisp chicken tenders reduces excess oil and calories while still delivering the crispy texture everyone loves. This healthy cooking method aligns with an active lifestyle and balanced diet, making it a smart choice for your family meals.
7. Frequently Asked Questions about Baked Chicken Tenders
Can I use chicken breasts instead of tenders?
Yes, just ensure to cut the chicken breasts into strips of similar size for even cooking.
Can I make this recipe gluten-free?
Absolutely! Use gluten-free flour and breadcrumbs or crushed gluten-free cereal for the coating.
How long does it take to prepare this dish?
The total prep and cooking time is approximately 40 minutes, making it perfect for a quick dinner.
Are there any good substitutions for Parmesan cheese?
Yes, nutritional yeast or shredded mozzarella can be used for a similar cheesy flavor without dairy.
8. Kitchen tools that you might need for this recipe
- CAROTE Premium 16pc Nonstick Cookware Set — Essential for even baking and easy cleanup.
- Ninja Air Fryer Pro Crisp & Roast — Perfect for reheating and achieving extra crispiness.
- Ninja SLUSHi Pro RapidChill Drink Maker — Keep your drinks cold while enjoying your delicious chicken tenders.
- KitchenAid Classic Iconic Stand Mixer — For mixing your breading ingredients with ease.
9. Conclusion
Preparing baked chicken tenders that are crispy, flavorful, and healthier has never been easier. Whether you’re cooking for your family or hosting friends, these homemade chicken tenders are sure to impress. With just a few simple ingredients and the right tools, you can enjoy a delicious, guilt-free crispy chicken dish anytime. Try this recipe today, experiment with different dipping sauces, and make crispy chicken tenders your new go-to favorite for dinner or lunch!
Print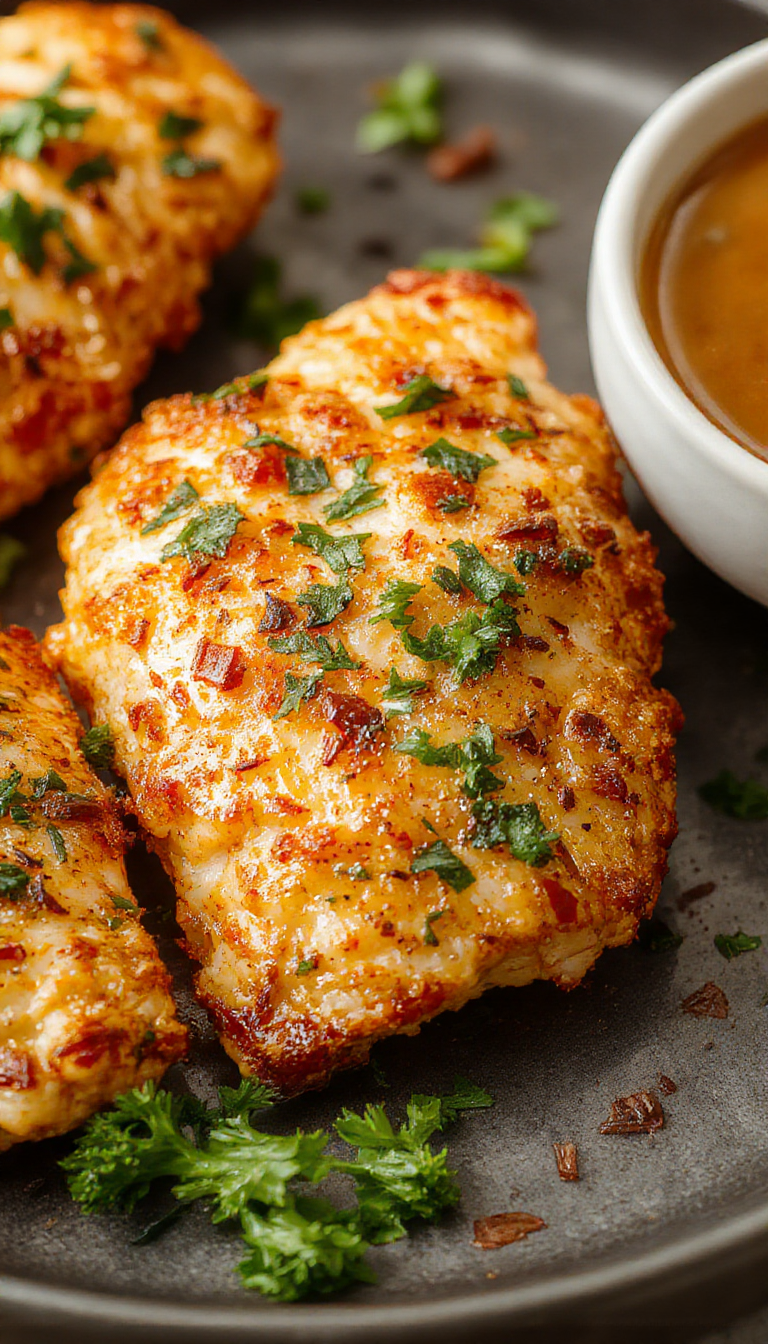
Golden Oven-Crisped Chicken Strips: Your New Family Favorite
Enjoy these Golden Oven-Crisped Chicken Strips, a healthy and delicious family favorite. Crispy on the outside and tender on the inside, these baked chicken tenders are perfectly seasoned and easy to make. Ideal for quick weeknight dinners or weekend gatherings, they offer a crunchy texture without the added fat of frying. Elevate your dinner game with this simple, flavorful, and healthier chicken tender recipe that everyone will love.
- Total Time: 30 minutes
- Yield: 4 servings
Ingredients
- 1 pound boneless, skinless chicken breasts or tenders
- 1 cup all-purpose flour
- 2 large eggs, beaten
- 1 cup panko breadcrumbs
- ½ cup grated Parmesan cheese (optional for extra flavor)
- 1 teaspoon garlic powder
- 1 teaspoon paprika
- ½ teaspoon black pepper
- Salt to taste
- Cooking spray or olive oil
Instructions
- Start by cutting the chicken into evenly sized strips to ensure they cook uniformly. Pat the chicken dry with paper towels and set aside.
- Set up three shallow bowls: one with all-purpose flour, one with beaten eggs, and one with a mixture of panko breadcrumbs, Parmesan cheese, garlic powder, paprika, salt, and black pepper.
- Dip each chicken strip into the flour, then the egg, and finally coat thoroughly with the breadcrumb mixture. Press lightly to adhere the breadcrumbs well.
- Preheat your oven to 400°F (200°C). Place the coated chicken strips on a baking sheet lined with parchment paper or a silicone baking mat. Lightly spray with cooking spray or drizzle with olive oil.
- Bake for about 20-25 minutes, or until the tenders are cooked through and crispy.
Notes
- Use chicken breasts or tenders based on preference; cut into uniform strips for even cooking.
- For gluten-free version, substitute gluten-free flour and breadcrumbs.
- To enhance flavor, add a pinch of cayenne pepper or your favorite herbs to the breadcrumb mixture.
- Prep Time: 10 minutes
- Cook Time: 20 minutes
- Category: Main Course
- Method: Baking
- Cuisine: American
- Diet: Healthy, Nut-Free
Nutrition
- Serving Size: 4 tenders
- Calories: 320 kcal Kcal
- Sugar: 2g
- Sodium: 600mg
- Fat: 13g
- Saturated Fat: 4g
- Unsaturated Fat: 7g
- Trans Fat: 0g
- Carbohydrates: 30g
- Fiber: 2g
- Protein: 25g
- Cholesterol: 90mg
26 thoughts on “Golden Oven-Crisped Chicken Strips: Your New Family Favorite”